
Automating HCP Vault Authentication with AWS and Python
- Feb 21, 2022
- 7 min read
Updated: Mar 18, 2022
In a previous blog series, we walked through how to set up HashiCorp Vault®. (You can find the blog series here.) In this blog post we will show how to use HashiCorp Vault® with the AWS Authentication method. We will use Python scripts as part of the implementation. The scripts will provide a seamless authentication scheme for applications deployed in AWS Elastic Cloud Compute (EC2). We will briefly discuss what HashiCorp Vault® is for those who are unfamiliar. Then, we will cover the assumptions and requirements. Finally, we will wrap up with a complete walkthrough of the buildout.
HCP Vault
If you haven’t heard of HCP Vault (https://www.hashicorp.com/products/vault), it is a secrets management solution from HashiCorp, or HCP, for short. It can store, manage, and even generate a wide range of secrets such as passwords, API keys, authorization tokens, and encryption keys to name a few. HCP Vault uses what is called a secrets engine to store, generate, and encrypt data. A single HCP Vault instance can have many secrets engines depending on the need since a secrets engine is essentially a path, like you would find in a file system; each path is its own secrets engine with defined parameters. HCP Vault has many authentication methods that can be leveraged for accessing secrets stored in the Vault, including:
AWS
GitHub
LDAP
Okta
Username & Password
This list is not exhaustive, but at least shows the diversity of authentication methods provided by HCP Vault. There are policies coupled with authentication methods that determine what the authenticated user can access. The secrets engine for HCP Vault can store a wide variety of secrets, including, but not limited to:
AWS IAM Access Credentials
Google Cloud Service Account Keys
SSH
Key/Value
PKI (Certificates)
Active Directory
The HCP Vault can be managed either through the web GUI, or via their API. (More information on their API can be found here.)
Assumptions and Requirements
As AWS has been around for quite some time and most people have either heard of it or have a general understating of what it is, we will not be going too in depth on it here. There are tons of resources already available if you wish to know more about AWS as a whole. For our purposes, I want to just cover what an EC2 instance in AWS is. At a high level, an EC2 instance is just a virtual machine provisioned with a defined set of criteria, such as, Operating System, RAM, CPU, etc. These instances are lightweight and designed for scaling in mind. You are charged for uptime, and the cost per hour depends on the amount of resources allocated to the instance. AWS does have a free tier that you can take advantage of for trying different configurations. (See here for more information.)
The requirements for this buildout are pretty straight forward: you just need an Amazon account with two EC2 instances. One of the instances will be hosting the HCP Vault, and the other will act as the authenticating application that checks out the credentials from the vault. For the walkthrough in the next part, we will be using two Ubuntu 20.04 instances. We will not be going through the process of setting up the EC2 instances as Amazon already has a great article for this, which can be found here. You will need an SSH client to connect to your instances. We will be using PuTTY.
Setting up HCP Vault and AWS Integration
This section will cover the full setup of HCP Vault using their Docker container on AWS EC2 instances. We will complement this deployment with some Python scripts to check out passwords from the HCP Vault without having to store any credentials in the Python files themselves. All the files for this setup are located out on GitHub here. I would recommend keeping the link handy as we will be using it to clone the files to the EC2 instances.
HCP Vault Setup
We will be setting HCP Vault up with a self-signed certificate. It is recommended that you set up HCP Vault with HTTPS, but it is not required.
Note: The method shown here for the certificate creation is just for demonstration purposes and is not meant to be used in a production environment.
1. First, login to the EC2 instance that will be hosting your HCP Vault and clone the GitHub repository mentioned above.
git clone git clone
https://github.com/zthurmond/CMG_Vault_Blog.git
2. Next, we will need to install some prerequisites (Docker and jq) as follows.
sudo apt-get update
sudo apt install docker.io jq -y
sudo systemctl enable docker
3. After cloning the repository, change the directory to the vault directory and make the shell scripts executable.
cd HCP_Vault_Blog/vault
sudo chmod +x *.sh
4. Next, start by creating a Root Certificate Authority (CA) and Root Certificate by running the generate_root_ca.sh script.
Note: You will be prompted for a password and some other identifying information; the only critical part that you need is the password that you input.
./generate_root_ca.sh
5. Now that the Root CA is created, create the server certificate by running the generate_server_cert.sh script.
Note: If you list out the contents (i.e., ‘ls’) the certs directory, you should see the needed certificate files.
./generate_server_cert.sh
6. After the certificate has been created, all the files should be present to create the container image and to start the container. Running the create_container.sh will do this.
./create_container.sh
7. You can check that the container is up and running before proceeding to the next steps.
sudo docker ps
8. After starting the container, some initial configuration needs to be done. By default, when the Vault starts or is restarted, it is in a sealed state. So, the Vault must first be initialized to get the unseal key and token used for logging into the vault. This can be accomplished with the setup_vault.sh script.
Important Note: This script will output the Unseal Key and Root Token. It is critical that you copy and save this information, so you have it for future use.
./setup_vault.sh
AWS Setup
Now that HCP Vault is setup and functional, we need to configure a few things on AWS to ensure the second server, an application server for this case, can authenticate to vault using the Role assigned to the EC2 instance. For this setup, we will be creating two roles, one for the vault server and another for the application server.
To configure AWS, follow the below steps:
1. Login to the AWS Management Console and navigate to IAM. On the left, select Roles and click Create Role. From there, select EC2 and click Next on the bottom right.

2. Click next until you get to the page where you assign a name to the Role. Input a name and click Create role in the bottom right.

3. Navigate to the Roles tab and select the role that you just created. Copy the Role ARN and store it somewhere that it can be used in a later step, such as a text file in Notepad.

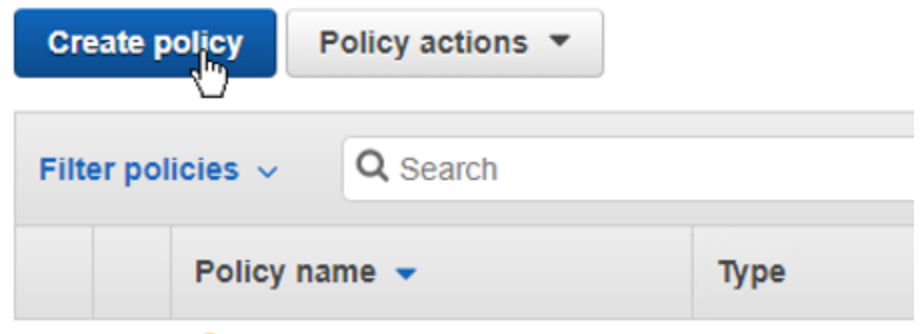
4. Under the policies tab on the left, Click Create policy.
5. Select the JSON tab and paste the following.
Important Note: Replace the “Resource” (“*** Web-App-Role ARN ***” below) in the first statement with your Web App Roles ARN.
{
   "Version": "2012-10-17",
   "Statement": [
       {
           "Action": [
                "iam:GetRole",
                "iam:GetUser"
           ],
           "Resource": [
                "*** Web-App-Role ARN ***"
           ],
           "Effect": "Allow"
       },
       {
           "Action": [
               "sts:GetCallerIdentity"
           ],
           "Resource": [
                "*"
           ],
           "Effect": "Allow"
       }
    ]

}
6. Click next in the bottom right until you get to the page where you assign a name to the role. Input a name and click Create policy.

7. Under the Roles tab on the left, click Create role and select EC2 from the list as before. In the select policy screen, filter the policies for the one you just created and select it.

8. Click next until you get to the page where you assign a name to the Role. Input a name and click Create role in the bottom right.

9. Back in the EC2 console, select the EC2 instance that you want to assign the roles to and select the action drop down in the upper right. Next, select Security > Modify IAM Role.

10. Select the role for the appropriate machine and click Save. Each instance should have a different role.

Finishing the Configuration and Testing
With AWS fully configured, we can continue with finishing the HCP Vault setup along with running a test to make sure it all works. The Python code that we will be running can be used in any application.
Important Note: In the following section, we use the root token for authentication directly from the shell prompt to make the HCP Vault API calls. I would NOT recommend this as it will be saved in your bash history. For a more secure approach, you could save the password to a temporary file and read the file into a variable that can be used in the commands.
1. First, log back into the Vault machine, if not already. Then, create a password in the vault for testing.
curl --header "X-Vault-Token: **TOKEN**" --request POST --data '{"options": {"cas": 0},"data": {"password": "$up3R_seCreT_P@s$w0rD"}}' --insecure https://127.0.0.1:8200/v1/secret/data/web/SQL
2. Next, create a policy, named web-app-policy, that allows read access to the created password.
Note: You will not get any response for this command.
curl -g --header "X-Vault-Token: **TOKEN**" --request POST --data '{"policy": "path \"secret/data/web/*\" {capabilities = [\"read\"]} "}' --insecure https://127.0.0.1:8200/v1/sys/policy/web-app-policy
3. Lastly, create an AWS Authentication method that utilizes the Web-App-Role we previously created in AWS and attaches the web-app-policy to give read access to the secret.
Important Note: You will need to input your Web-App-Role ARN.
curl --header "X-Vault-Token: **TOKEN**" --request POST --data '{"auth_type": "iam","bound_iam_principal_arn": ["**Web-App-Role ARN**"],"policies": ["web-app-policy"],"token_ttl": "2"}' --insecure https://127.0.0.1:8200/v1/auth/aws/role/web-app-role
4. Now that everything is setup, it is time to run a test. But before we can do that a few prerequisites are needed. Run the following commands to install the required prerequisites.
Important Note: The last command here will put a record in the hosts file that will resolve the hostname “vault” to the private IP of your vault server. You will need to replace the IP here with the one of your vault servers.
sudo apt install python3-pip -y

pip3 install botocore

sudo sed -i '/127.0.0.1/a 172.31.100.5 vault' /etc/hosts
5. Login to the Web server and clone the git repository. After cloning the repository, navigate to HCP_Vault_Blog/app and run the app.py script. You should get the password we created earlier printed to the screen.
Note: If this isn’t working, it is likely a networking issue, or you may have named something different than what I did.

Wrapping Up
So, we’ve finished the deployment. Everything seems to be in working order, and we can retrieve the password from HCP Vault without having any hard coded secrets in the Python scripts. The authentication works by checking the caller identity’s role, the role assigned to the EC2 instance. Since the EC2 web instance has the web role assigned to it and the vault instance is able to get the callers identity via the policy we assigned to the vault role, the password can be retrieved from HCP Vault autonomously and securely. This functionality would be taken up a step further if passwords in the HCP Vault were rotated.
Reach Out to Us
If you need more information about how to implement Hashicorp Vault® or another vaulting solution, or how to automate the use of secrets, reach out to us. CMG (Career Mentor Group) specializes in automation and integration. If you want, you can even schedule a meeting with us to discuss possible solutions or help with DevOps resources.


Comments