
How to get started with HashiCorp Vault® for Secrets Management in your DevOps Pipeline – Part 3
- Nov 11, 2021
- 8 min read
Updated: Mar 18, 2022
Wrapping Up Our Solution
In our first two blogs we laid the foundation for our HashiCorp Vault® solution. In Part 1 of 3 we covered an overview of the solution. In Part 2 of 3 we began our installation of Vault. In this final blog of our series, we will complete the configuration of the Vault environment (Major Step #3). Then we will retrieve a secret from the Vault. As a bonus, we will create a second secret and retrieve it from the Vault.
Major Step #3: Setting Up the Vault
Configure the Environment Variables for Vault
Run the commands in Figure 1 to set the environment variables used by the Vault binary when executing commands.
Be sure to substitute in the IP address of your Vault server in place of {{YOUR VAULTIP}}. Note: VAULT_SKIP_VERIFY=1 is used to ignore SSL errors.
export VAULT_ADDR=https://{{YOUR VAULTIP}}:8200
export PATH=$PATH:/usr/local/bin/vault.d
export VAULT_SKIP_VERIFY=1
Figure 1 - Set Environment Variables
Initialize the Vault
Run the command in Figure 2 to initialize the Vault. This creates an empty vault, the root token to the vault, and five (5) “unseal” keys. These keys are critical for setting up the vault further and for starting the vault.
You will see output like that in Figure 3.
Critical Note: The unseal keys and initial root token are only shown when you first initialize the vault. Below you will see important steps to back these up. Don’t lose them! Without these keys you will NOT be able to start the vault backup and use your existing encrypted secrets.
vault operator initFigure 2 - Initialize Vault

Figure 3 - Vault Initialization Output
Backup the Unseal Keys and the Initial Root Token
The unseal keys are used to “unseal” the vault. When unsealing, you must provide 3 of the 5 keys which will allow Vault to access the stored secrets. This process must be repeated whenever the Vault service is stopped for any reason.
Copy the unseal keys to the clipboard and back up the keys to a secure location. They should only be stored in a location that can be access by people you want to be able to start the vault up.
Copy the initial root token to the clipboard and back up the token to a secure location.
Important Note: The initial root token allows you to perform actions on the Vault as the root Vault account, which has full privileges to the vault. Protect this token!
Unseal the Vault
Copy any of the three keys that were backed up from the “Initialize the Vault” step above.
Run the “unseal” commands in Figure 4 to unseal the vault.
Important Note: Be sure to substitute your own keys for {{{key 1/2/3}}}!
vault operator unseal {{{key 1}}}
vault operator unseal {{{key 2}}}
vault operator unseal {{{key 3}}}
Figure 4 - Three Unseal Keys
Run “vault status” as in Figure 5. You should see the “sealed” property set to “false” as in Figure 6.
vault statusFigure 5 - Vault Status

Figure 6 - Vault Status Output
Access the Vault as root
The environment variables we’ve been setting are for the Vault binary to use in the command line.
Run the command in Figure 7 to set the VAULT_TOKEN variable to the root token.
The root token allows you to act as root on the vault. You need root access on the vault so that you can complete the following steps to configure the secrets engine. Make sure to replace {{{your root token}}} with the initial root token you captured in the “Initialize the Vault” step above.
export VAULT_TOKEN={{{your root token}}}Figure 7 - Set VAULT_TOKEN Environment Variable
Configure the first secrets engine
Run the commands in Figure 8. The two “vault” commands will 1) enable a secrets engine of type “kv” (key/value) with the root path “webapp1” and 2) create a secret at the path “webapp1/secrets”.
In Figure 8 you will see the secret (key/value pair) that will be created.
The key is “key1”
The value is “secret1”
Important Note: This is the key/value pair secret you will retrieve from Vault later to prove the solution works.
vault secrets enable -path=webapp1 kv
vault kv put webapp1/secrets key1=secret1
Figure 8 - Configure the First Secrets
You can use the local “vault” command to retrieve the key/value pair from the Ubuntu server’s command line.
Run “vault” command in Figure 9 to display the secret key/value pair that was created.
vault kv get webapp1/secretsFigure 9 - Retrieve a Secret from the Command Line
The output should look like Figure 10.
You should see “key1” in the “Key” column
You should see “secret1” in the “Value” column
If you’d like to see other Vault commands that are available from the command line, type in “vault kv”.

Figure 10 - Key/Value Output
Configure the PKI secrets engine
Here we will enable the PKI secrets engine. This secrets engine allows you to generate certificates which can be used for authentication to whatever other systems you have.
Run the commands in Figure 11. In this case, we will use a client certificate to authenticate against Vault’s own certificate authentication method.
vault secrets enable pki
vault secrets tune -max-lease-ttl=87600h pki
Figure 11 - Enable the PKI Secrets Engine
Configure the Root CA
You need to configure the root CA for the vault so that it can generate its own certificates. This is necessary to use certificates as the authentication mechanism to retrieve stored secrets from the vault.
Run the commands in Figure 12. There are only two commands. Both start with “vault write”. Make sure to copy each as a single command line.
vault write -field=certificate pki/root/generate/internal common_name="vault.pki" ttl=87600h > CA_cert.crt
vault write pki/config/urls issuing_certificates="http://127.0.0.1:8200/v1/pki/ca" crl_distribution_points="http://127.0.0.1:8200/v1/pki/crl"
Figure 12 - Configure the Root CA
Configure the Intermediate or Issuing CA
We will use this CA to generate the client certificate.
Run the five (5) commands in Figure 13. There are five (5) commands. They all begin with “vault”. Make sure to past the two “vault write” commands that are word wrapped as single lines.
vault secrets enable -path=pki_int pki
vault secrets tune -max-lease-ttl=43800h pki_int
vault write -format=json pki_int/intermediate/generate/internal common_name="vault.pki Intermediate Authority" | jq -r ".data.csr" > pki_intermediate.csr
vault write -format=json pki/root/sign-intermediate csr=@pki_intermediate.csr format=pem_bundle ttl="43800h" | jq -r ".data.certificate">intermediate.cert.pem
vault write pki_int/intermediate/set-signed certificate=@intermediate.cert.pem
vault write pki_int/roles/vault-dot-pki allowed_domains="vault.pki" max_ttl="720h" allow_subdomains=true
Figure 13 - Configure the Intermediate CA
Generate the client certificate
Run the command in Figure 14. This will create a file in the current directory called testserver01.
vault write pki_int/issue/vault-dot-pki common_name="testserver01.vault.pki" ttl="24h" > testserver01Figure 14 - Generate the Client Certificate
The resulting file needs to be split into public and private key files.
The split key files then need to be copied to the Windows client desktop.
Run the command in Figure 15.
cat testserver01Figure 15 - Print testserver01 File to Screen
Copy the key “certificate” and the “private key” as shown in Figure 16.
The certificate begins and ends with “-----BEGIN CERTIFICATE” and “END CERTIFICATE-----“, inclusive.
The “private_key” begins and ends with “-----BEGIN RSA PRIVATE KEY” and “END RSA PRIVATE KEY-----“, inclusive.
Split this: Into the certificate and private key


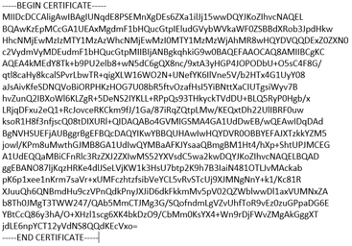


Figure 16 - Certificate and Private Key
Run the command in Figure 17 to create the test server certificate.
Paste the certificate data (you split out above) into the command line as shown in Figure 18.
Type “EOF” at the end and hit enter as shown in Figure 18.
cat <<EOF>>testserver01.cerFigure 17 - Create testserver01.cer

Figure 18 - Paste Certificate Data
Repeat the same process with the private key file (you also split out above).
Run the command in Figure 19.
Paste the certificate data (you split out above) into the command line.
Type “EOF” at the end and hit enter.
cat <<EOF>>testserver01.keyFigure 19 - Create testserver01.key
Copy the contents of the certificate and private key files into two text files on the Windows client desktop as in Figure 20.
Save as testserver01.cer and testserver01.key, respectively.

Figure 20 - testserver01.key
Enable certificate-based authentication
Run the command in Figure 21 to enable certificate-based authentication.
The Python script on the Windows 10 workstation will use certificate-based authentication to retrieve the stored secret key/value pair.
vault auth enable certFigure 21 - Enable Certificate-based Authentication
Create and apply policy
Run the command in Figure 22 to create a policy file.
Paste the contents in Figure 23 into the command line to populate the content of the file. This policy gives the necessary permissions so that the secret can be accessed.
cat<<EOF>>testserverpolicy.hclFigure 22 - Create testserverpolicy.hcl
path "webapp1/secrets/*" {
 capabilities = ["create", "read", "update", "delete", "list"]
}

path "webapp1/*" {
 capabilities = ["read", "list"]
}
EOF
Figure 23 - testserverpolicy.hcl Contents
Run the command in Figure 24 to create the policy in Vault.
vault policy write testserverpolicy testserverpolicy.hclFigure 24 - Create the Policy in Vault
Create the Authentication Identity
Run the command in Figure 25. An identity called “testserver01” will be created with the “testserverpolicy” policy set in Figure 24 applied to it. Note: The command in Figure 25 is a single line.
This identity will be used to authenticate using the testserver01.cer certificate.
The CER file is the public key, and the private key will need to be present on the client to complete the authentication.
vault write auth/cert/certs/testserver01 display_name=testserver01 policies=testserver01 certificate=@testserver01.cerFigure 25 - Create the Authentication Identity
Retrieving a secret (credentials) using Python scripts
Install Python on the Windows Client
The following steps will install the prerequisites on the Windows 10 workstation noted in the “Prerequisites” section above.
Install an IDE that supports Python. I use Microsoft Visual Studio Code.
Install Python. It’s recommended to install it for all users and to add python to the PATH variable options during installation.
Install the requests library using pip in the VS code console.
Install Certificates on the Windows Client
Create a folder on the desktop called “Vaultdemo” as in Figure 26.
Copy the previously created testserver01.cer and testerver01.key files into the Vaultdemo folder on the desktop.

Figure 26 - Create Vaultdemo Folder
Launch Visual Studio Code (or whatever IDE you are using).
Copy the contents of the Python scripts in Figure 27 and Figure 28 into two files: gettoken.py and getsecrets.py.
Save them as gettoken.py and getsecrets.py in the Vaultdemo folder on the Windows desktop.
Once they have been saved as .py files, VS Code will prompt you to install the Python plugins.
You need to install the Python plugin in VS Code. Follow the prompts to complete the plugin installation.
Important: Modify {{YOURVAULTIP}} with the Vault IP address in both Python scripts.
##gettoken.py
import os, requests, urllib3

urllib3.disable_warnings(urllib3.exceptions.InsecureRequestWarning)


URL = "https://{{YOURVAULTIP}}:8200/v1/auth/cert/login"
r = requests.post(url = URL, cert=("testserver01.cer","testserver01.key"),verify=False)
response = r.json()

token= response["auth"]["client_token"]
Figure 27 - gettoken.py
##getsecrets.py
import requests
import gettoken
from gettoken import token


URL = "https://{{YOURVAULTIP}}:8200/v1/webapp1/secrets"

HEADERS = {"X-Vault-Token":token}
r = requests.get(url = URL, headers = HEADERS, verify=False)
response = r.json()

print(response)
for secrets in response["data"]:
 print("#### separator ####")
 print(secrets)
 print("#### separator ####")
 print(response["data"][secrets])
Figure 28 - getsecrets.py
Run the getsecrets.py script
To prove you can retrieve the secret key/value pair remotely, you will now execute the getsecrets.py script. Refer to Figure 29.
Make sure you are in the Vaultdemo directory so that the script can find the required certificate files.
In the VSCode IDE, click View > Terminal to see the VS Code Console.
Then, cd (change directory) to the \Desktop\Vaultdemo\ directory.

Figure 29 - VSCode IDE Terminal
Execute the getsecrets.py script by pressing the “play” button in the upper, righthand corner as in Figure 30.

Figure 30 - VSCode Play Button
If successful, the secrets previously created will be displayed in the console output as in Figure 31.

Figure 31 - Secrets Display
SUCCESS! You have successfully retrieved stored secrets from the secure Vault.
Bonus: Creating a New Secret and Retrieving It
As a bonus exercise, you can create another secret and retrieve it from the Windows Desktop as well.
Access the Vault website
In a web browser, navigate to https://{{YOURVAULTIP}}:8200as in Figure 32.
Log in with the root token to see how Vault is configured.

Figure 32 - Vault Web Interface
Create an Additional Secret
Add an additional secret to the secrets folder that was created by following the screen shots in Figure 33.

Figure 33 - Add Additional Secret
Re-run the getsecrets.py script and see the new secret as in Figure 34.

Figure 34 - Re-Run getsecrets.py
Bringing it all together
Hopefully you’ve found this blog series helpful and informative. As you can see, although the process for obtaining the secret is simple, building out the Hashicorp Vault® platform takes some work. The work we performed in this three-part series lays the foundation for exercises we will cover in future blog articles. In those articles, we will cover more complex tasks such as access to secrets for cold-booted machines and dynamically generated secrets which expire quickly.
Reach Out to Us
If you need more information about how to implement Hashicorp Vault® or another vaulting solution, or if you need help in automating your CI/CD pipeline, reach out to us. CMG (Career Mentor Group) specializes in automation and integration. If you want, you can even schedule a meeting with us to discuss possible solutions or help with DevOps resources.


Comments